Dollhouse Blogs

Sunday 3 September 2023

A new day

 Hello everyone,

I hope you are all well. I have been planning a big update post but I am afraid all miniatures are on hold again. Gemma and Vigo have a new brother.


We have named him Remo Christos. Remo and Vigo were always our favourite names for boys, and Christos is in honour of one of the doctors who did so much to try and save Vigo 

I will eventually be back to Blogger, but with a young toddler and a newborn free time is non existent.

Big hugs to all

Giac

P s. I keep visiting your blog's, but blogger does not let me comment... It keeps saying I am logged off even though I signed in !?!

Monday 9 May 2022

A reason to wake up in the morning.

 Hello my dear friends.

The past few months have been hectic…Jo and I welcomed a daughter into our home


We have named her Gemma Samara. Gemma was our first name choice for a girl, and Samara is in honour of the amazing doctor who was in charge of Vigo when he was ill. The past year and a half has bern incredibly difficult, in fact I do not believe  the pain of losing Vigo will ever stop, but it is wonderful to have a reason to wake up in the morning. Life without a child was not for us and she has helped us beyond measure (though I look forward to the night she will sleep in her bed and not our arms).

Big hug to you all

Giac

Saturday 1 May 2021

The Banquet Hall


Hello everyone,


I hope you are all doing well. I am still waiting on some candelabra for the table, but since it has been a while since my last post, I thought it was time to present the banquet hall to you.


The room measures 24 inches wide, 39 inches deep and 18 1/2 inches high. The design was inspired by my favourite architect, Robert Adam.  The colour palette was inspired by winter. The blues remind of nice winter days, and the metallic platinum paint I highlighted the details with makes me think of ice. The white was perfect to make the architectural elements pop out.
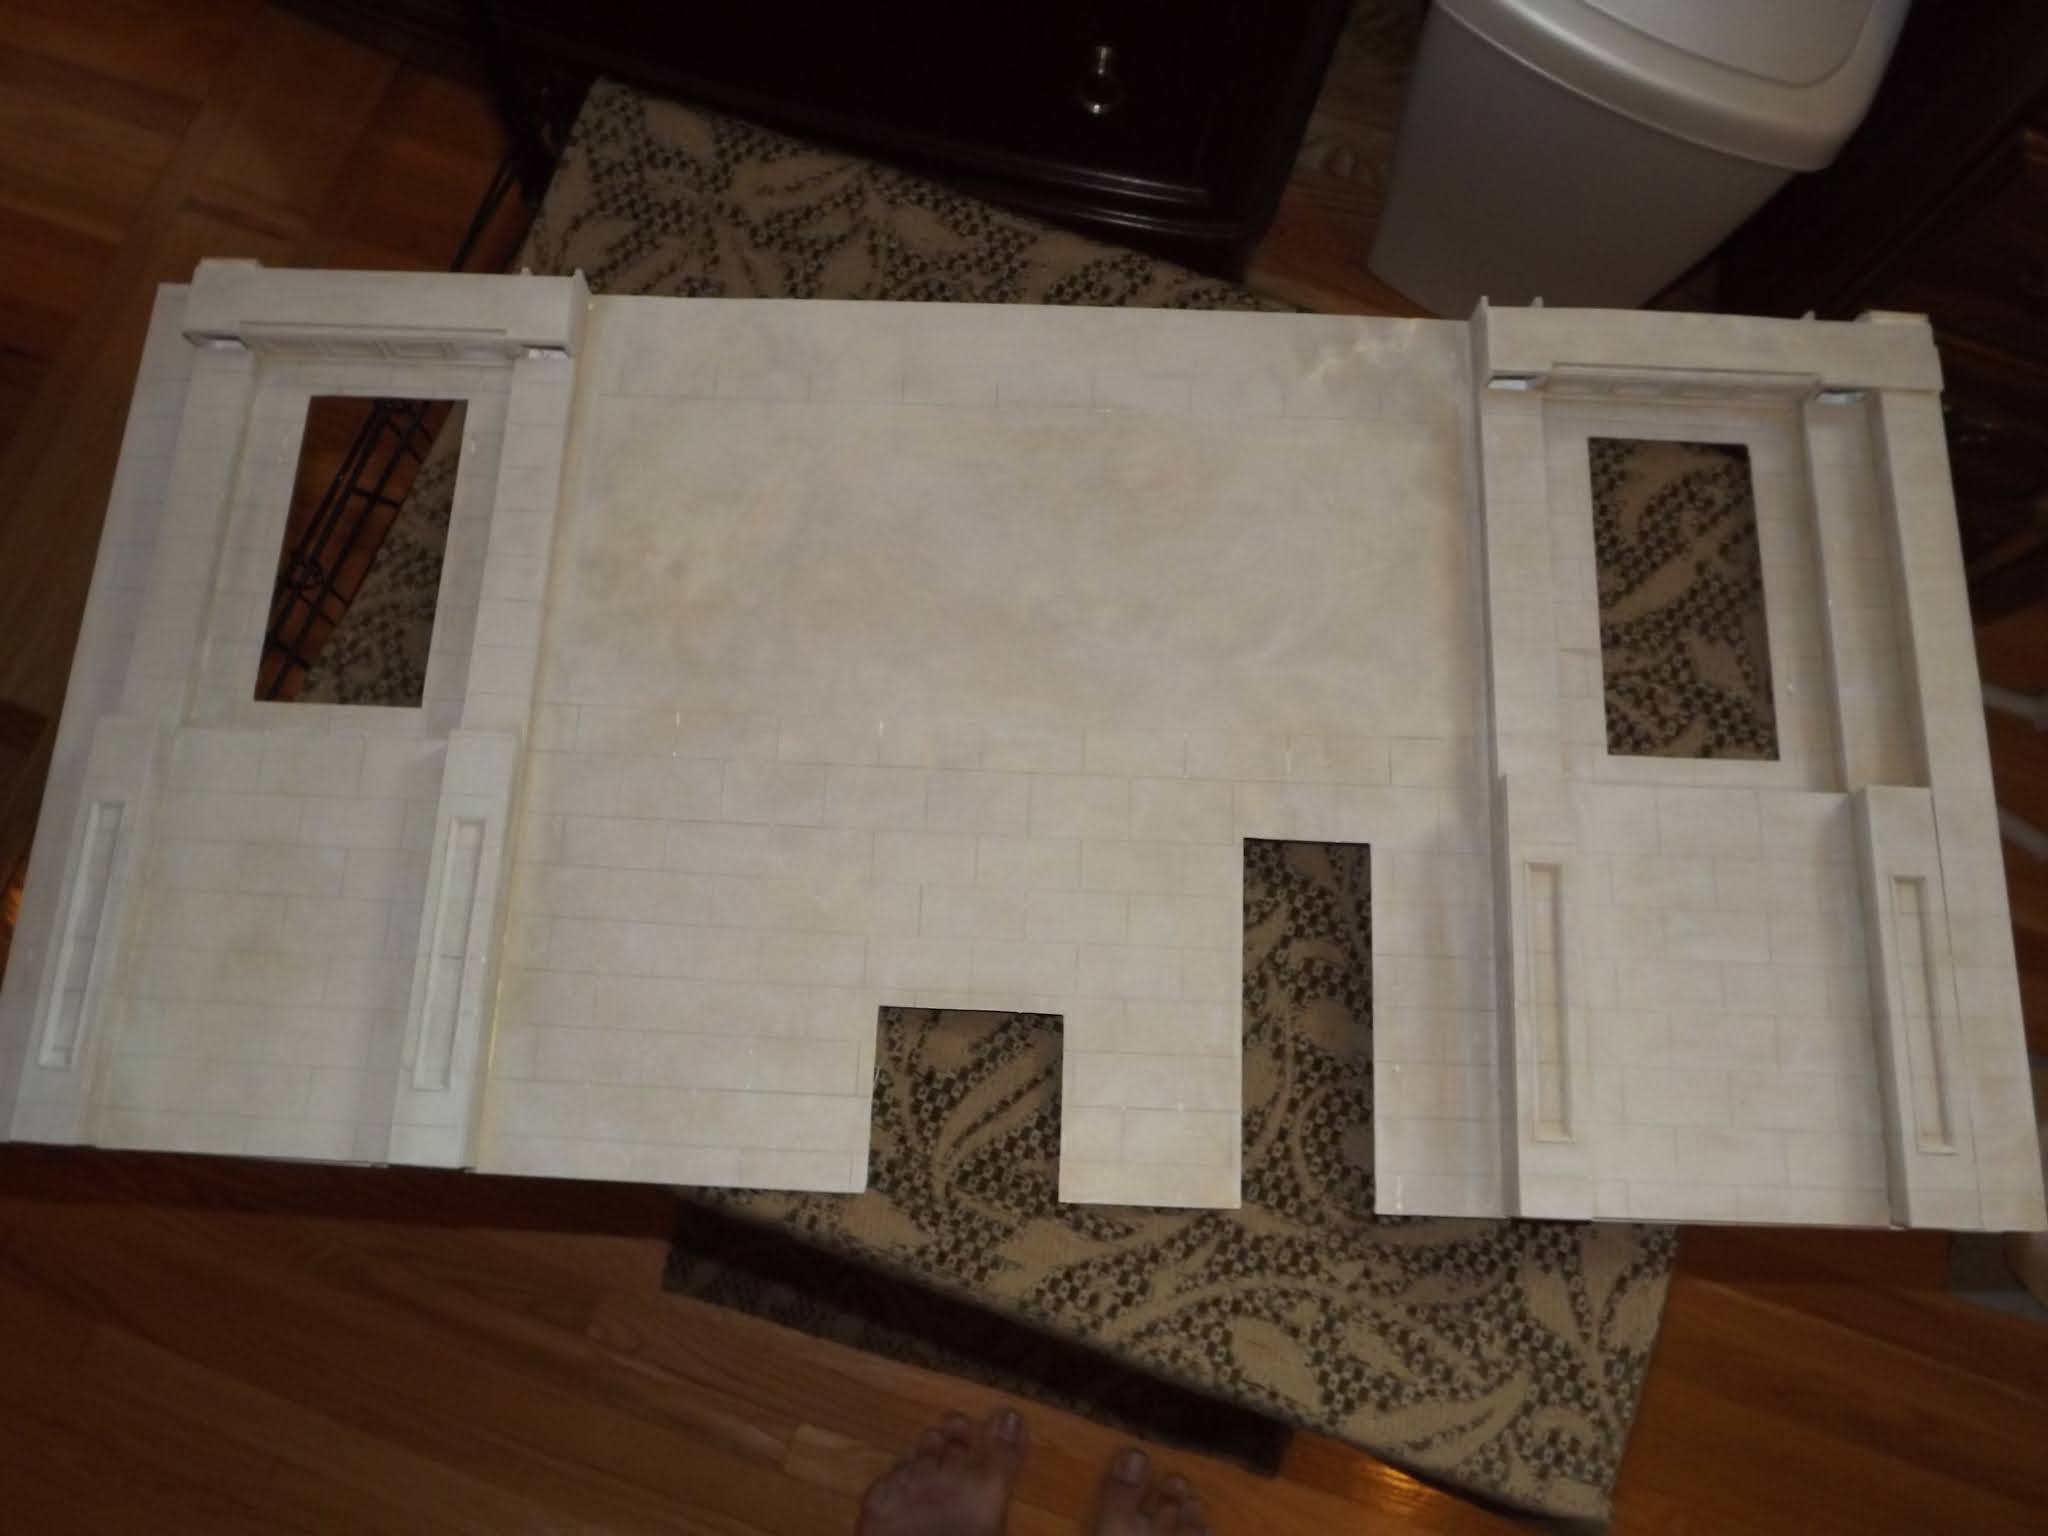
The walls

My original plans were for a room 21.5 inches high, but the proportions of my drawings looked a bit off to me


I decided to remove the 3 inches below the pilasters. I emailed Sue Cook and she was kind enough to send me pictured of the plaster pieces as per my drawings.


When the plans were finalized I cut the openings into the MDF and covered the walls in 2 layers of Illustration board. The reason I used 2 layers is because I needed the first one to give me the depth I needed for the niches I was going to use, and the second layer I cut out openings for the plaster plaques that went over the frieze. I thought gluing them right onto the walls would make them stick out to much and take away from the realism of the room.


The darker blue circles at the top of the room are rectangular boxes in which I will put busts.

I don't have great tools for cutting 5/8 mdf, so I used plaster filler in the curved openings of the 8 arches in the room which I sanded smooth


I also used illustration board on the ceiling with a cut-out for the plasterwork. I painted the whole room in a pale blue.


Then I glued on all the pre-painted plasterwork onto the walls. Each piece got 3 coats of dark blue, 3 coats of white, and 2 coats of platinum, then touch ups.


The doors are illustration board,  basewood mouldings and Plexiglas. I faux finished them darker than most of the warm woodwork in the manor so they would stand out better!


The ceiling

I used the paint app. on my computer and copy/ pasted images from Sue Cook's website to create the ceiling, and I also had a dry run to see it live. I was happy with the effect!


The different pieces were not all the same thickness. When the time came to glue them, it involved a lot of sanding and using thin cardboard to get every piece to the right depth. It was not really difficult and was faster than I thought.


To fill any gaps and cover any inconsistencies in depth I used a simple moulding strip to frame the plasterwork. The 2 chandeliers are Olivias from the Getzans. I was originally going to paint the ceiling plasterwork the darker blue, but I thought that would make the ceiling look to heavy, not light and airy which was my hope.


The floor

I decided early on to have a stone floor in this room. Wood just felt wrong , not to mention I have had my full of making parquet wood floors. I drew up a plan which reflected the areas of the ceiling (you can compare it with the ceiling plan earlier in the post


I covered the illustration board subfloor with 3 coats of acrylic Gesso which I sanded down and covered in a sand grey paint. Even though the theme is Adam winter, I still needed to warm the room up somehow. I then made templates using thin cardboard to help me paint the dark grey areas. When that was done I used a sculpting tool to score the individual tiles and then covered 6 inch sections at a time with spackle I wiped of immediately for grout. I glued it down using books and weights.


 The furniture

It has often been difficult to find furniture that is the right scale for the manor, so in this room I decided to make it myself except for the chairs.


The table

The table was made from leftover MDF and turned wood pieces I had left over. It measure 6 inches wide and 21 inches long.  The first picture shows how I used the drill to create the curved parts of the bottom of the feet before I cut each one out.


I then glued the feet, filled any imperfections with spackle and sanded everything smooth. then faux finished it with a yellow base coat and created my usual faux walnut finish with oil paints that match the doors and windows of the room.


The table top was 2 pieces of MDF glued together. I applied coats of gesso and sanded about 5 times to get a smooth finish, but the faux-finish looked terrible and showed the separate pieces the table top was made from, so I ordered 1/32 inch thick basewood to cover it.


The basewood had a nice grain to it, so I cut the pieces at an angle to create a pattern. I did not use a yellow basecoat, I just covered it with the oil paint and liquin mix which I wiped off with paper towels after 3 minutes.

The Chairs

The chairs were Chrysnbon Victorian chair kits I assembled, faux-finished and upholstered using a fabric from Les Chinoiseries...all 20 of them!


The sideboards, cutlery urns and server


I made these out of leftover bits and pieces I had. The hardest part was the rounded faux drawers. I cut the tops and bottoms of each one and curved a thin piece of basewood over the front, then glued a basewood molding over that to create the detailed front


The side pieces are illustration board boxes topped with upside down crown moulding. I faux finished it with the yellow base and oil-liquin mix, but the tops and panels were the same as the table top so the grain would show.


The cutlery urns were impossible to find, so I purchases wood finials. I do not have a lathe, so I put the bottom into my drill and as I held down the button of the drill to make it turn I used sandpaper, files and a saw to cut off the top, make the rounded section where I put the keyhole less round, and I made the base thinner. I used the paint on-wipe off technique again to make the grain stand out.


The keyholes on the urn are from Le Mini di Pierluigi, and the pineapple finials on the top are by Sue Cook. I painted them and the base of the urns using the yellow base coat first to contrast with the central part of the urns.


I also made a smaller server for the back of the room. Same techniques, just a little bit simpler.


And here is the furniture in place


As I mentioned I am waiting on candelabra from Jens Torp  for the table. All the rest of the silver in the room is by Pete Acquisto. I am also waiting on some decanters by Gerd Felka for the server. I would love to set the table one day, but 20 place settings including plates, glassware, flatware and cutlery is not my budget priority right now.

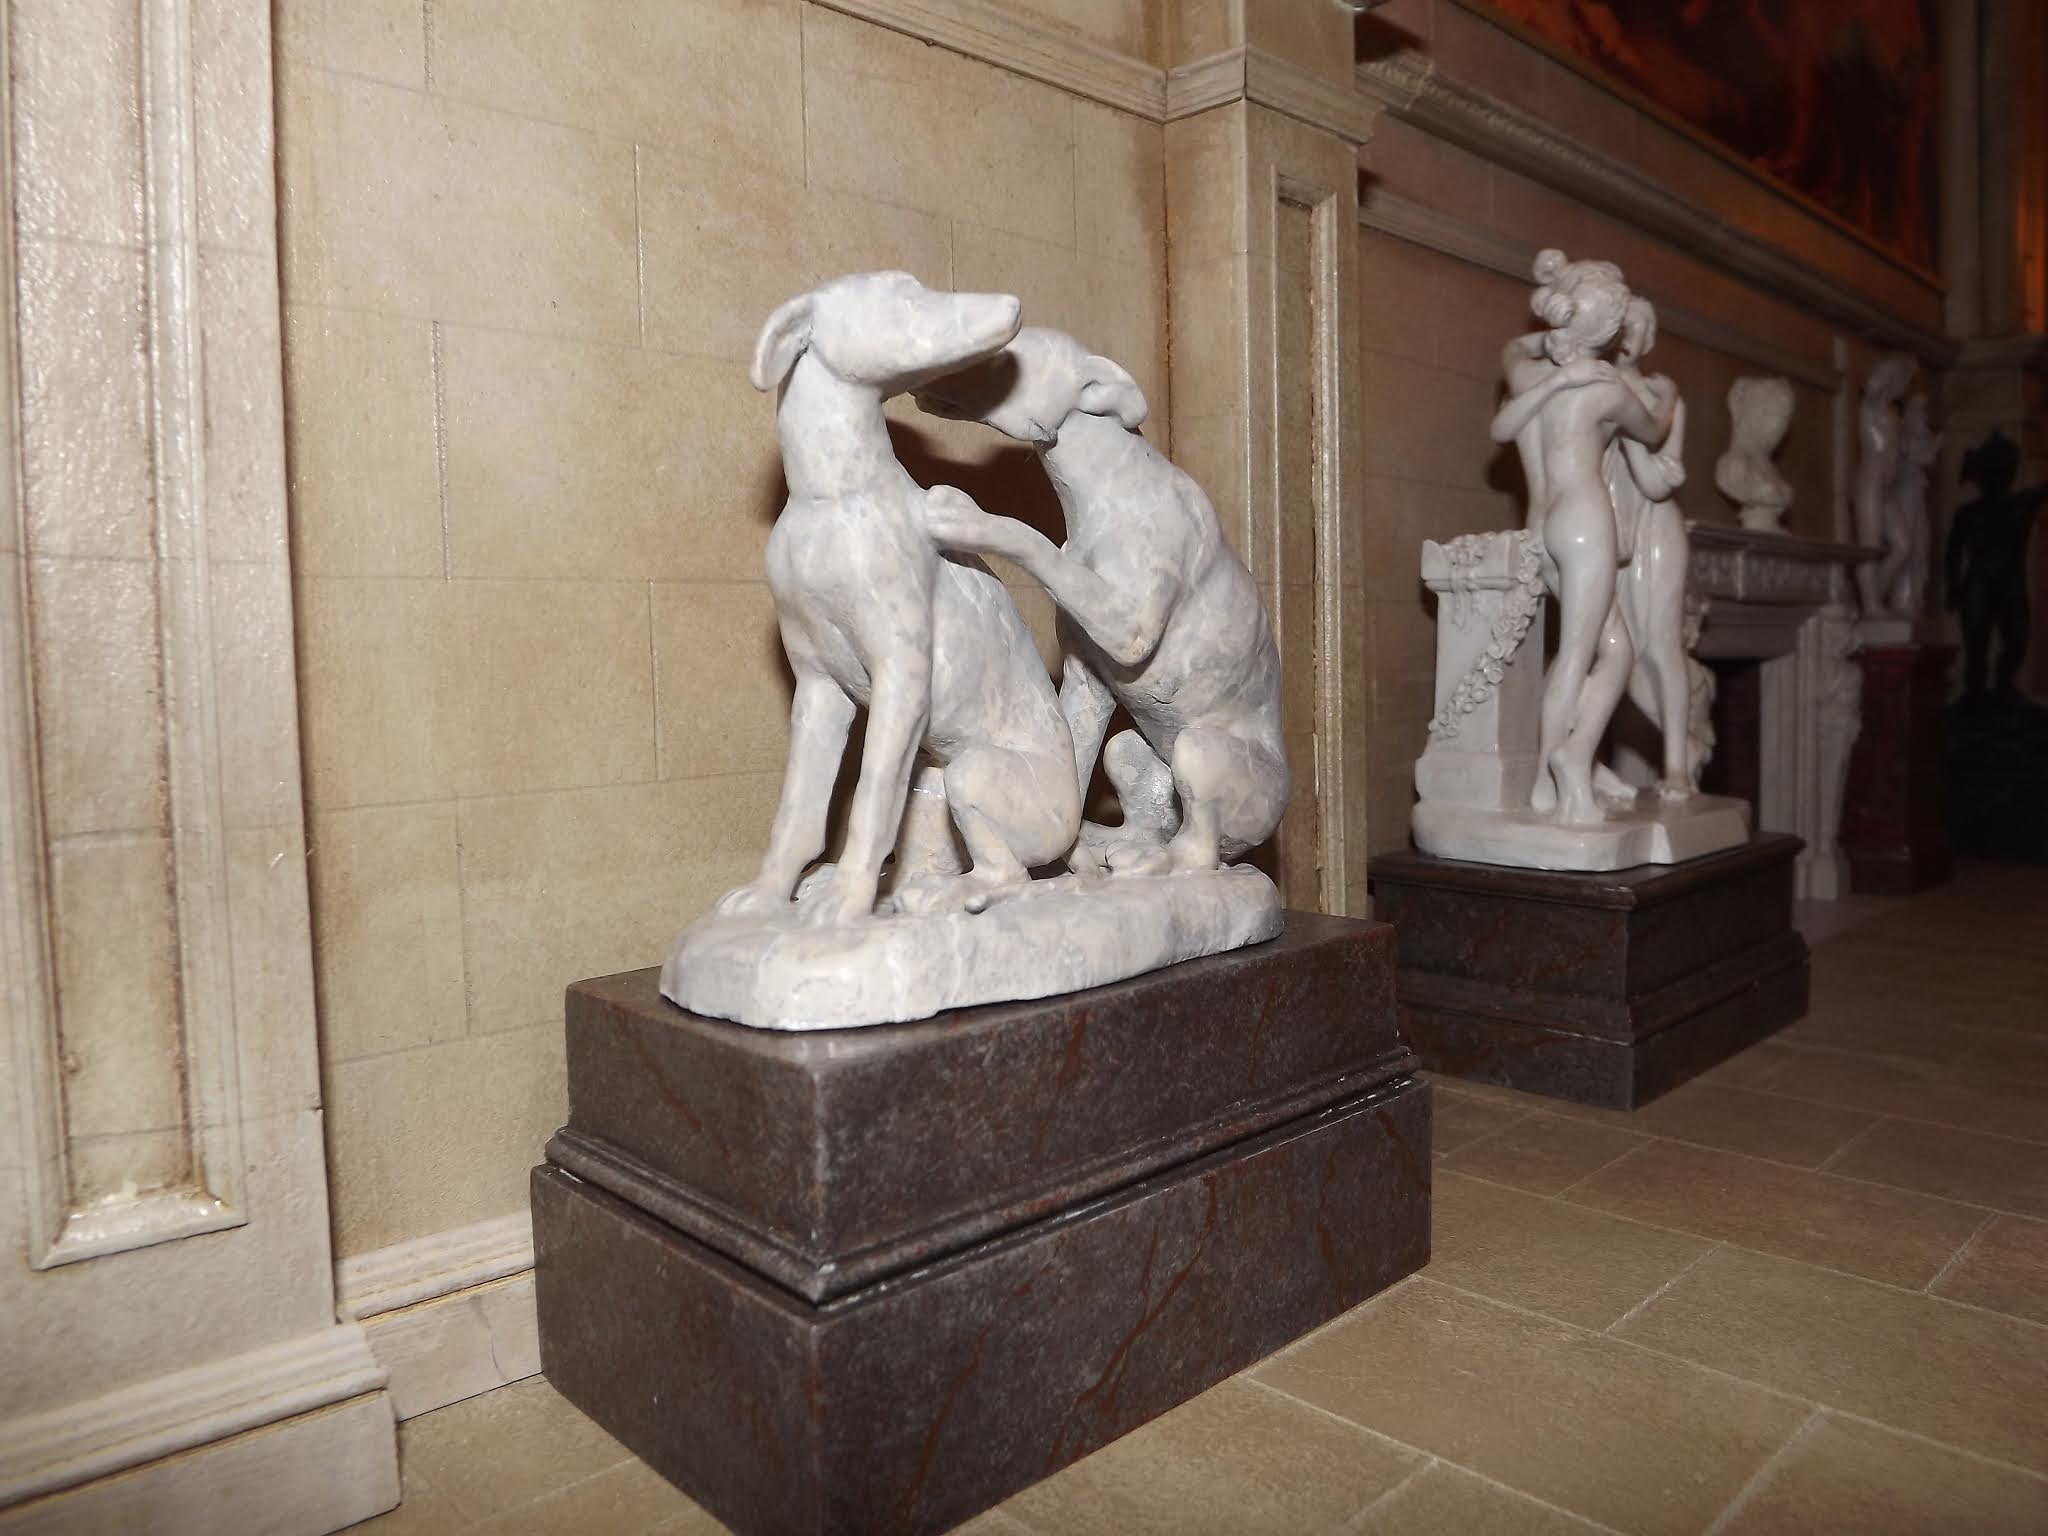
And that is the banquet hall my friends. Here are a few empty room pictures for your enjoyment:


That was the last of the big rooms of the house. I have been working on remodelling and completing other rooms and will post about them soon.  Until then I thank you all for your support my friends. I hope you all stay well, healthy, and happy.

Big hugs,

Giac

Sunday 31 January 2021

Sculpture Gallery


Hello everyone,

I hope you are all doing well in these crazy time. I have been away for a long time, but I have been trying very hard to create a new normal. I took 2 months off work and during that time I would fall to pieces the minute I was not doing something, so I spent a lot of time working on my miniatures while trying to make sense of everything...still having a hard time with that one. Today, I present to you one of the rooms I was able to create, The sculpture gallery.


This space was difficult to plan out. It measure 39" x 12" and 18"high and opens to the banquet hall. At the back of the room is a staircase I had to work around. I decided to create a sculpture gallery. The idea of the room came from the sculpture gallery at Chatsworth house, but the design was inspired by Chatsworth's Painted Hall.

I started by building each wall on illustration board. I built out sections using leftover lumber I had on hand and illustration board. Since the room is quite long I felt it needed architectural elements to break it up and make it interesting. The back wall has a window, and the side walls each have 2 cut-outs that are the same size as the window. I was not sure what to do with them, but I am a sucker for symmetry.


I decided to make the walls and floor look like stone. After the structural elements were glued in I covered it all in 3 coats of gesso, then sponged on 2 paint colors, scribed the lines to create the stone,  then washed everything with a 1 to 10 mix of water and burnt umber paint which I wiped off after about 3 minutes with paper towels. I then sealed everything with a mat spray and let it dry.

I On the north side I decided to install a mural. I order a poster of Apollo and the muses that was just the right size and scale. I glued it into place then painted over every shape with modge-podge so the light reflected would make it look like paint, not a flat mat poster.


I installed the walls, floor and illustration board ceiling using books, weights, clamps...anything I could find that fit and would not damage the finishes I made.


When everything was glued in place, I installed the cornice around the room and the ceiling medallions.


The ceiling medallions were centered between the cut-outs on the wall, so I decided to put mirrors in to reflect the light. I spray painted 1/16 in basewood strips gold and purchased 1"mirror squares. I glued them onto graph paper first, then glued them in the cut-outs and covered the gaps with trim, also spray painted gold.


I cut-out a large section in the center of the ceiling for a lantern, another idea inspired by Chatsworth's sculpture gallery.


The sides of the lantern are just illustration board backed with wood, and the top is 1/4 mdf I had lying around. I just need to fill the window openings with Plexiglas and then cover the exterior with illustration board to make it clean.


I used a simple cornice and a frieze to make the lantern more interesting. 


I plan on adding a third Minuet chandelier in the middle of the lantern eventually. The lantern is kept in place with wood stoppers I glued on the outside of the ceiling so it can be removed for access or if I ever need to put this section of the manor upside down for cleaning or repairs.


I had several sculptures I wanted to use, mostly souvenirs from our trips which I had painted to look like stone, but I decided to make pedestals for each one. I made them, once again, out of illustration board and leftover wood to make them solid. I used joint compound to fill the gaps and wood grain...a lot of sanding. I painted on the marble effect and then waxed on the sculptures.


One sculpture that is special is the Townley Greyhounds Karl Blindheim made for me. Faux-marbling them was a task, but I really love them.


One thing that was important to me was to make something in honour of Vigo. I contacted Sue Cook and sent her 3 pictures of my monkey baby, and she made a magnificent profile plaque for me. I glued it onto one of her over mantels and built a base for the memorial using leftover door cases I had. I spent a whole day faux marbling it until it was just right. I cannot thank Sue enough...the likeness still brings me to tears and it warms my heart that that he is always going to be part of my manor. Miniatures is my art and this was the only way I could honour him.


And that is it for the Sculpture gallery. Here are a few pictures, both filled and empty, of the room. 


Here is a quick look at the manor today. I am still not sure how it got to this size! Next time I will present the Banquet hall.


I cannot thank you all for your kindness through the loss of my sweet Vigo. I apologize for not answering those who took the time to send me private emails. I started trying to answer them, but  I could not do it. I have lost the person I loved most in my life, and the person who loved me the most. Doctors and nurses tried so hard to help him, but after his death they confirmed he had Primary HLH. My poor baby did not have a chance.  Jo and I went back to work early in January. I love my job and the people I work with, but every day Jo and I realize life is going on even without him, and that just hurts so, so badly. One day at a time.


A big hug to you all my friends.

Giac


P.S. I am on Facebook and Instagram, but as long as Blogger is up you can count on my being here posting and following your amazing work.